


下载安装文件和解压脚本
wget -q https://github.com/cloudflare/cloudflared/releases/latest/download/cloudflared-linux-amd64.deb && dpkg -i cloudflared-linux-amd64.deb
如不能下载,直接下载安装文件
https://github.com/cloudflare/cloudflared/releases/latest/download/cloudflared-linux-amd64.deb
下载后运行安装文件
./cloudflared-linux-amd64.deb
登陆
cloudflared tunnel login
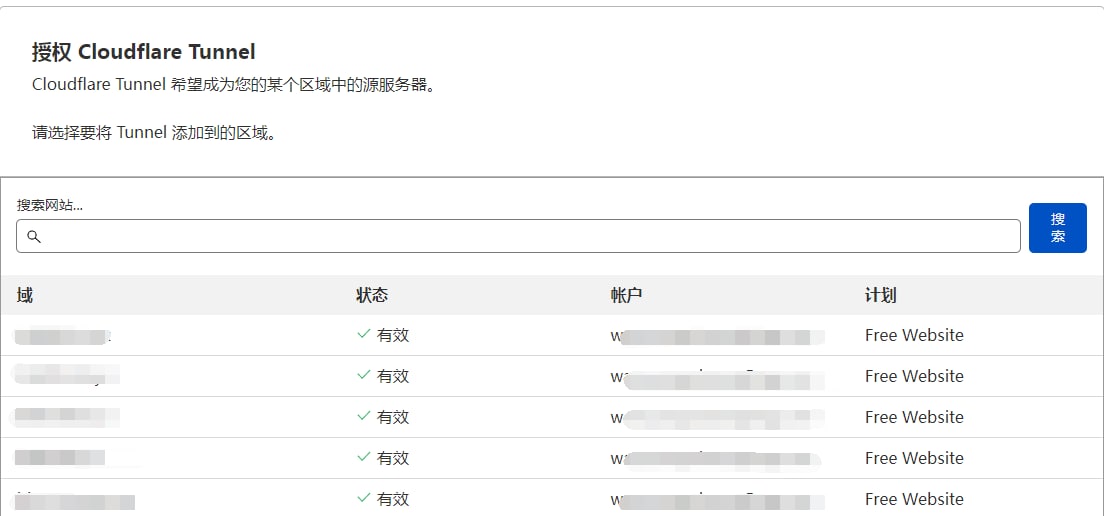
登陆后用给到授权地址如下图在CF选择需要反代的域名,脚本会自动下载密钥文件,如果最后一行末尾显示net/http: TLS handshake timeout,需要自行用给出的地址下载pem密钥文件到/root/.cloudflared/cert.pem
得到Tunnel credentials written to /root/.cloudflared/
tunnel: -9df6-48ea--f457b2a****
credentials-file: /root/.cloudflared/*****.json
进入/root/.cloudflared/目录 创建项目
cloudflared tunnel create <项目名称>
关联项目名称和CF的域名
cloudflared tunnel route dns <项目名称> ***.qtmcat.com
/root/.cloudflared/目录下创建config.yml 加入以下
tunnel: *****-9df6-48ea-*****-f457b2a****
credentials-file: /root/.cloudflared/*****.json

ingress:
  - hostname: ***.qtmcat.com
    service: http://192.168.2.38:端口
  - hostname: qtmcat.com
    service: http://192.168.2.38:8090
  - hostname: **.qtmcat.com
    service: http://192.168.2.206:端口
  - hostname: **.qtmcat.com
    service: http://192.168.2.210:端口
  - hostname: **.qtmcat.com
    service: http://192.168.2.210:80
  - service: http_status:404

运行项目
cloundflared tunnel run <项目名称>
开机后台运行
cloudflared service install
添加新网址后需要重新安装
先卸载
cloudflared service uninstall
之后重新安装后台运行,之前需要删除原来的配置文件
rm /etc/cloudflared/config.yml
评论区