


直接下载
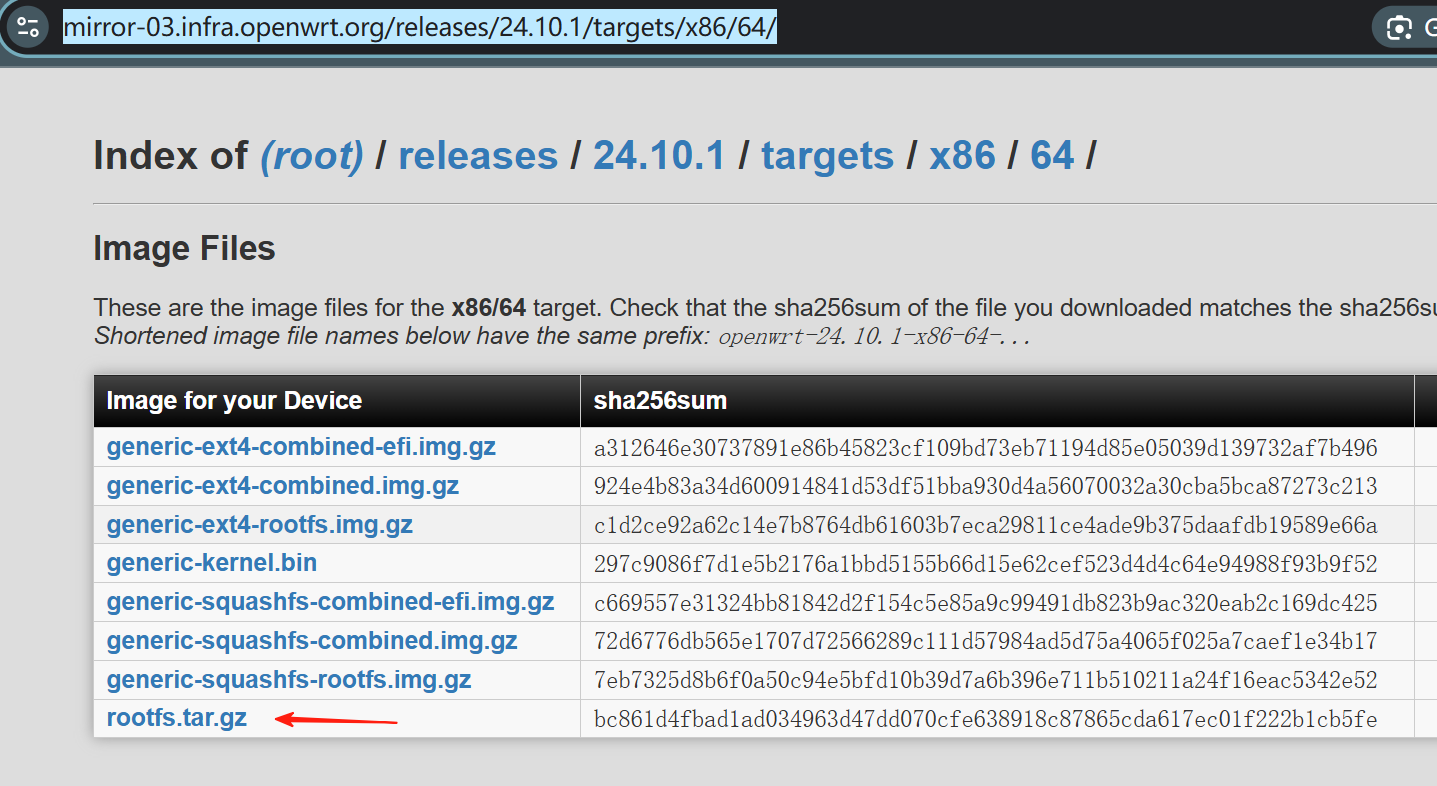
wget -P /var/lib/vz/template/cache/ https://mirror-03.infra.openwrt.org/releases/24.10.1/targets/x86/64/openwrt-24.10.1-x86-64-rootfs.tar.gz
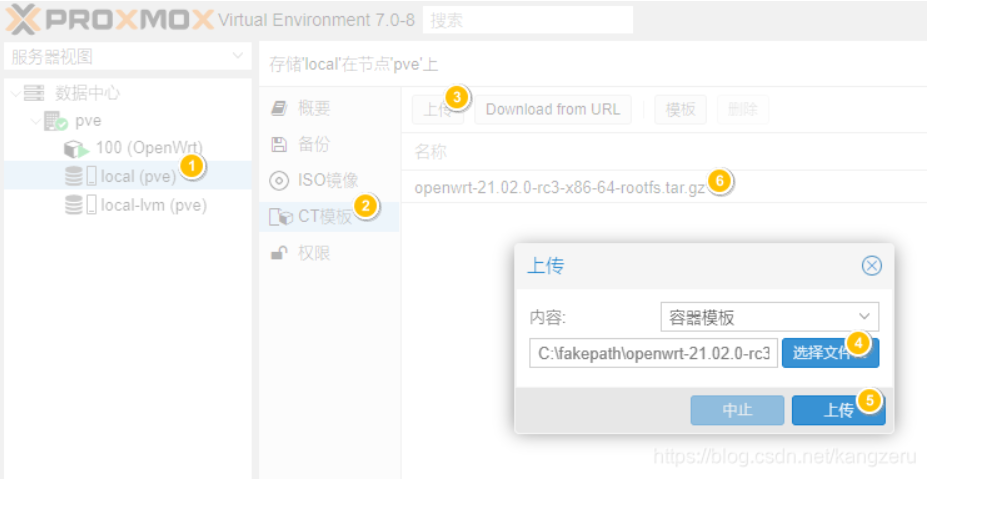
或者下载完后上传到LXC 模板
命令行安装
pct create 100 local:vztmpl/openwrt-24.10.1-x86-64-rootfs.tar.gz \
  --rootfs local:2 \
  --ostype unmanaged \
  --hostname openwrt-ct \
  --arch amd64 \
  --cores 2 \
  --memory 512 \
  --swap 0 \
  -net0 bridge=vmbr0,name=eth0
3.准备
将网线连接到pve管理口,然后关闭原openwrt虚拟机,删除直通的网卡
准备一份没有引导的openwrt固件包,可以是img也可以是tar.gz,但一定是没有引导的包,可以看文件名中包含rootfs字符,比如openwrt-x86-64-generic-ext4-rootfs.img或openwrt-21.02.0-x86-64-rootfs.tar.gz(前者是我自己编译的,重点在于rootfs)。
4.说明
如果是从虚拟机切换,建议不删除直通后不要删除虚拟机,先跑一段时间测试一下稳定性和兼容性,目前来说我已经跑了7-8个小时左右了,没有出现5105机器之前遇见过的重启,同时该方式也在大流量下经过了测试,也没有遇见重启。
除此之外,本人也是摸着石头过河,所以不是专业人士,很多地方只去说明了怎么设置。
创建基础环境文件包
1.tar.gz格式
如果包后缀为tar.gz,则通过scp直接上传至pve,以下[]内的字符根据自己情况进行替换(包括[和]符号):
scp [固件路径.tar.gz] root@[pveIP地址]:/var/lib/vz/template/cache
2.img格式
上传固件:
scp [固件路径.img] root@[pveIP地址]:/root
这里需要注意,如果你的固件包是带squashfs字符,比如openwrt-x86-64-generic-squashfs-rootfs.img,你需要按照下面的方式进行解压。
安装解压包:
apt install squashfs-tools
解压镜像文件:
unsquashfs [固件路径.img]
解压完成后你在同级目录下会得到squashfs-root文件夹,然后进入该文件夹,跳至3步骤。
如果你是不带squashfs字符,比如openwrt-x86-64-generic-ext4-rootfs.img,则需要通过挂载镜像,得到内部文件,首先创建一个挂载点(下面操作在root目录中进行):
mkdir op
然后挂载镜像:
mount -t ext4 -o loop [固件路径.img] /root/op
然后进入/root/op,跳至3步骤(完成后,通过使用umount /root/op进行卸载镜像)。
3.打包为pve的CT模板包:
进入上述2步骤中得到的文件夹中,然后使用下列命令进行打包,得到的文件下文称为op-ct模版:
tar zcf /var/lib/vz/template/cache/[固件名称].tar.gz ./*
创建容器
准备工作做完后,就开始创建lxc容器,通过下列命令进行创建:
pct create 110 local:vztmpl/openwrt-x86-64-generic-ext4-rootfs.tar.gz --rootfs local-lvm:2 --ostype unmanaged --hostname openwrt-ct --arch amd64 --cores 2 --memory 1024 --swap 0 -net0 bridge=vmbr0,name=eth0
这里详细说明一下每个参数的意思,使用的时候需要根据自己的情况进行更改:
pct create:容器创建命令
110:容器ID,可根据自己情况设定
local:vztmpl/openwrt-x86-64-generic-ext4-rootfs.tar.gz: 为第三步骤所得到的固件包名称
–rootfs:模版为rootfs文件
local-lvm:2 :后面的数字代表分配的磁盘大小,比如我这里设置的为2,即为即将创建的容器分配2G的大小
–ostype unmanaged:操作系统类型,这里没有填写指定的操作系统(不会影响)
–hostname openwrt-ct:主机名,也就是虚拟机名称
–arch amd64:设置为64位
–cores 2:分配给容器的核心数(我不知道这里是不是和docker一样,为最大限制)
–memory 1024:分配给容器最大的内存数量
–swap 0:交换分区设置为0
-net0 bridge=vmbr0,name=eth0:网卡,这里一定要设置,不然你的op没有办法连接到pve的虚拟交换机。
按照上述命令执行完成后,应该会得到如下的内容:
root@pve:/var/lib/vz/template/cache# pct create 110 local:vztmpl/openwrt-x86-64-generic-ext4-rootfs.tar.gz --rootfs local-lvm:2 --ostype unmanaged --hostname openwrt-ct --arch amd64 --cores 2 --memory 1024 --swap 0 -net0 bridge=vmbr0,name=eth0
Logical volume “vm-110-disk-0” created.
Creating filesystem with 524288 4k blocks and 131072 inodes
Filesystem UUID: 15d6753a-ceb2-45d3-9dca-903f97f0f197
Superblock backups stored on blocks:
32768, 98304, 163840, 229376, 294912
extracting archive ‘/var/lib/vz/template/cache/openwrt-x86-64-generic-ext4-rootfs.tar.gz’
Total bytes read: 143063040 (137MiB, 86MiB/s)
网卡直通
编辑lxc容器的配置文件,进行网卡直通:
vim /etc/pve/lxc/[容器ID].conf
在最下面添加以下内容:
openwrt.common.conf是PVE自带的openwrt配置文件示例,内含一些基本设置
lxc.include: /usr/share/lxc/config/openwrt.common.conf
/dev/ppp pppoe拨号等功能需要用到
lxc.cgroup.devices.allow: c 108:0 rwm
钩子脚本,用于添加 /dev/ppp等设备
hookscript: local:snippets/hookscript.pl
这里是网卡直通重要的部分。
lxc.net.1.type: phys
lxc.net.1.link: enp3s0
lxc.net.1.flags: up
lxc.net.2.type: phys
lxc.net.2.link: enp4s0
lxc.net.2.flags: up
lxc.net.3.type: phys
lxc.net.3.link: enp5s0
lxc.net.3.flags: up
需要注意,网卡直通部分里面的网卡名字,需要根据pve控制面板选择【pve】-【系统】-【网络】中查看,其中一定避免管理口,我这里是enp2s0为管理口,所以没有直通,而是在启动容器的时候,作为桥接接进来了。
我的软路由为5105四口,所以这里排除了管理口,我直通了2-4网口。
除此之外,89楼的朋友提醒了一下,关于“lxc.cgroup.devices.allow: c 108:0 rwm”这配置,需要自行确认,你可以登陆pve ssh,然后通过"ls -al /dev/ppp"查看字符设备ppp,比如下面就是我的ppp设备的编号,主编号为108,次编号为0,所以这里就是108:0,使用前可以先行确认。
创建拨号的文件链接。
mkdir /var/lib/vz/snippets
cp /usr/share/pve-docs/examples/guest-example-hookscript.pl /var/lib/vz/snippets/hookscript.pl
vim /var/lib/vz/snippets/hookscript.pl
然后修改内容:
    在第36行可以找到以下内容
    # Second phase 'post-start' will be executed after the guest
    # successfully started.

    print "$vmid started successfully.\n";
修改为
# Second phase ‘post-start’ will be executed after the guest
# successfully started.
system(“lxc-device add -n $vmid /dev/ppp”);
system(“lxc-device add -n vmid started successfully.\n”;
设置防火墙
在pve管理界面,选择创建的容器,然后切换至防火墙页面,点击添加,然后添加两次,每次只需要改动方向in和out和勾选启用。按照下面的教程中,设置端口好像报错,但不设置设备接入后又无法联网,但这样添加后,即可联网。
重启
重启整个pve,如果不重启直接启动容器,这个网卡会提示找不到,具体原因暂不知道。重启后,即可启动容器,按照正常的openwrt配置即可。
其他
这里配置openwrt的时候需要注意,因为网卡是直通的,所以网卡名可能和虚拟机不一样,虚拟机中是eth0-3,而在容器里面,除了指定的eth0(管理口,也是网口1),剩余的网口名称为enp3s0、enp4s0、enp5s0,也就是对应的2、3、4口(我的环境下),所以根据自身情况选择对应的网口分配wan和lan口进行。
在设置完wan口和防火墙后,openwrt拨号设置后,你需要重启pve,才能生效。我猜测这是因为拨号配置是挂载的pve的,所以pve将配置文件载入到内存中,即使重启容器也还是从pve内存中读,应该有其他方法在pve中重载入配置文件,但目前我没有找到。
参考
https://www.right.com.cn/forum/thread-8218119-1-1.html
https://blog.csdn.net/kangzeru/article/details/115373587
https://4xu.net/posts/koolshare-2.html/
https://pvecli.xuan2host.com/lxc-network-bypass/
实操后精简总结流程
LXC创建后,配置文件修改, 路径 /etc/pve/lxc/100.conf
arch: amd64
cores: 4
features: nesting=1
hookscript: local:snippets/100-hook.sh
hostname: openwrt-ct
memory: 4096
net0: name=eth1,bridge=vmbr0,hwaddr=BC:24:11:DE:ED:AB,type=veth
ostype: unmanaged
rootfs: local-zfs:subvol-100-disk-0,size=2G
swap: 0
lxc.cgroup2.devices.allow: c 10:200 rwm
lxc.cgroup2.devices.allow: c 108:0 rwm
lxc.mount.entry: /dev/net/tun dev/net/tun none bind,create=file
lxc.mount.entry: /dev/ppp dev/ppp none bind,create=file
lxc.net.0.type: phys
lxc.net.0.name: eth0
lxc.net.0.link: enp4s0
lxc.net.0.flags: up
lxc.net.1.type: veth
lxc.net.1.link: vmbr0
lxc.net.1.name: eth2
lxc.net.1.flags: up
钩子文件内容:
#!/bin/bash

# Hook script for OpenWrt NIC passthrough
# $1 = phase (pre-start, post-stop)
# $2 = container ID

case "$1" in
  pre-start)
    echo "[HOOK] Pre-start: Detaching NICs from host"
    ip link set enp4s0 down #按照实际直通的网卡名称更换
    ;;
  post-stop)
    echo "[HOOK] Post-stop: Reattaching NICs to host"
    ip link set enp4s0 up #按照实际直通的网卡名称更换
    ;;
esac

exit 0

钩子文件保存路径
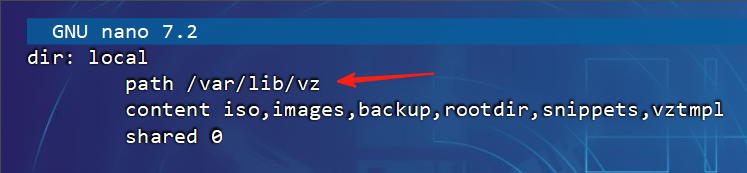
首先开启储存snippets功能
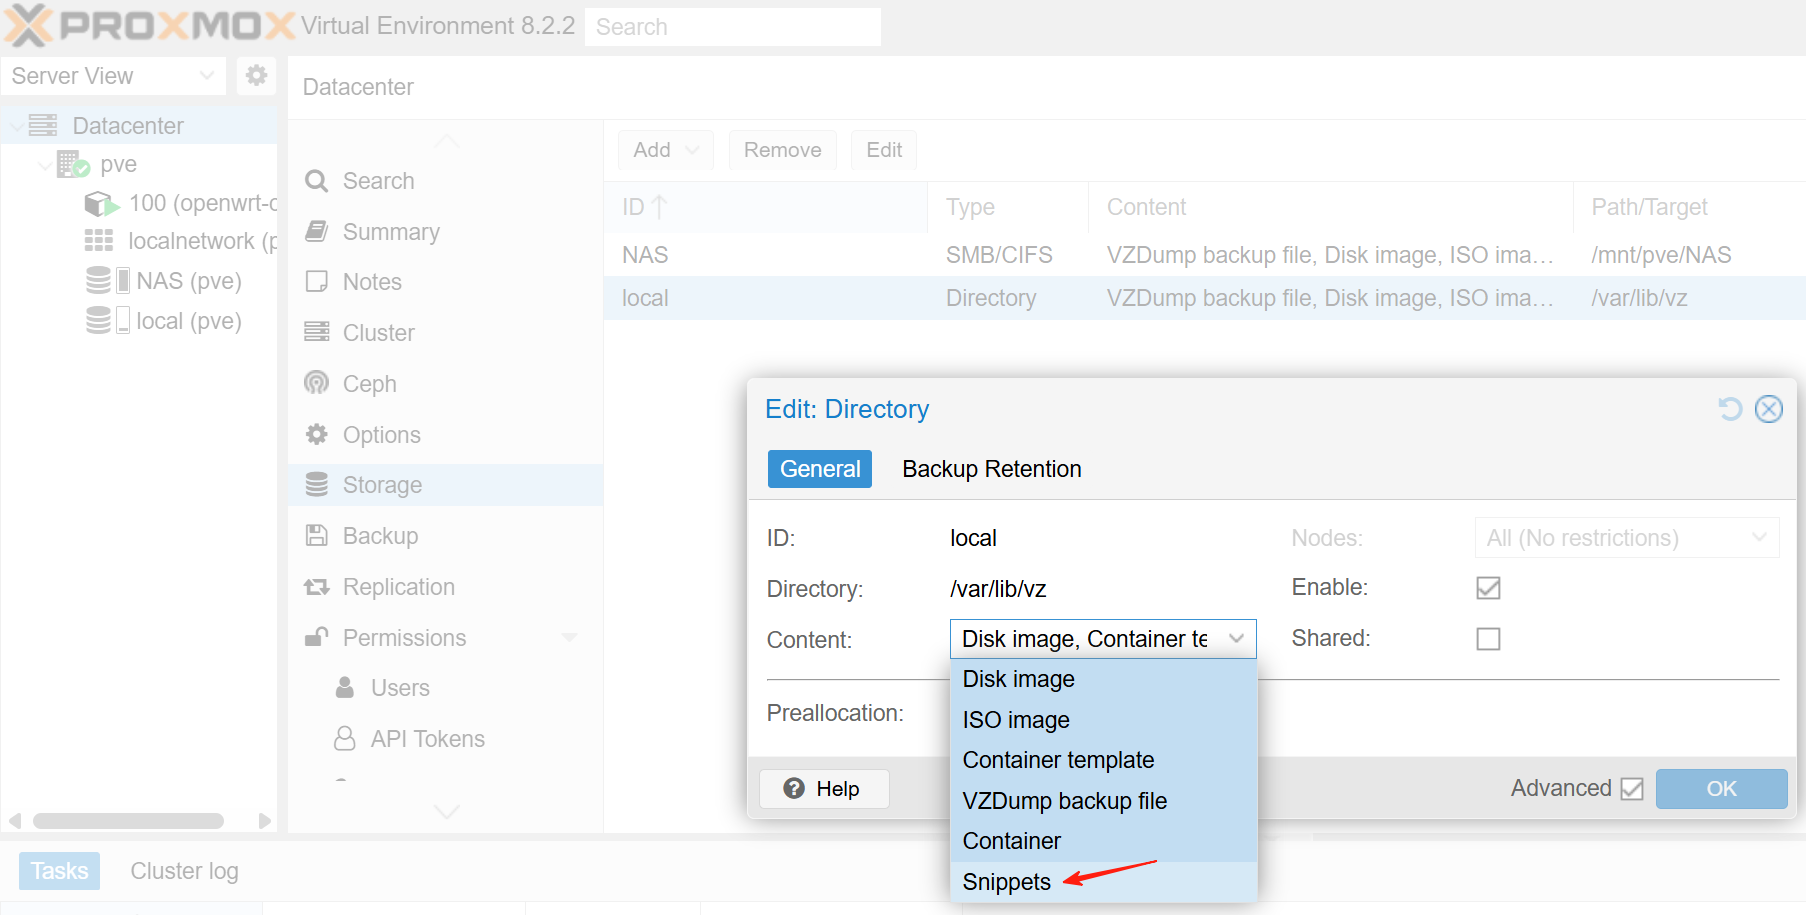
找到snippets路径
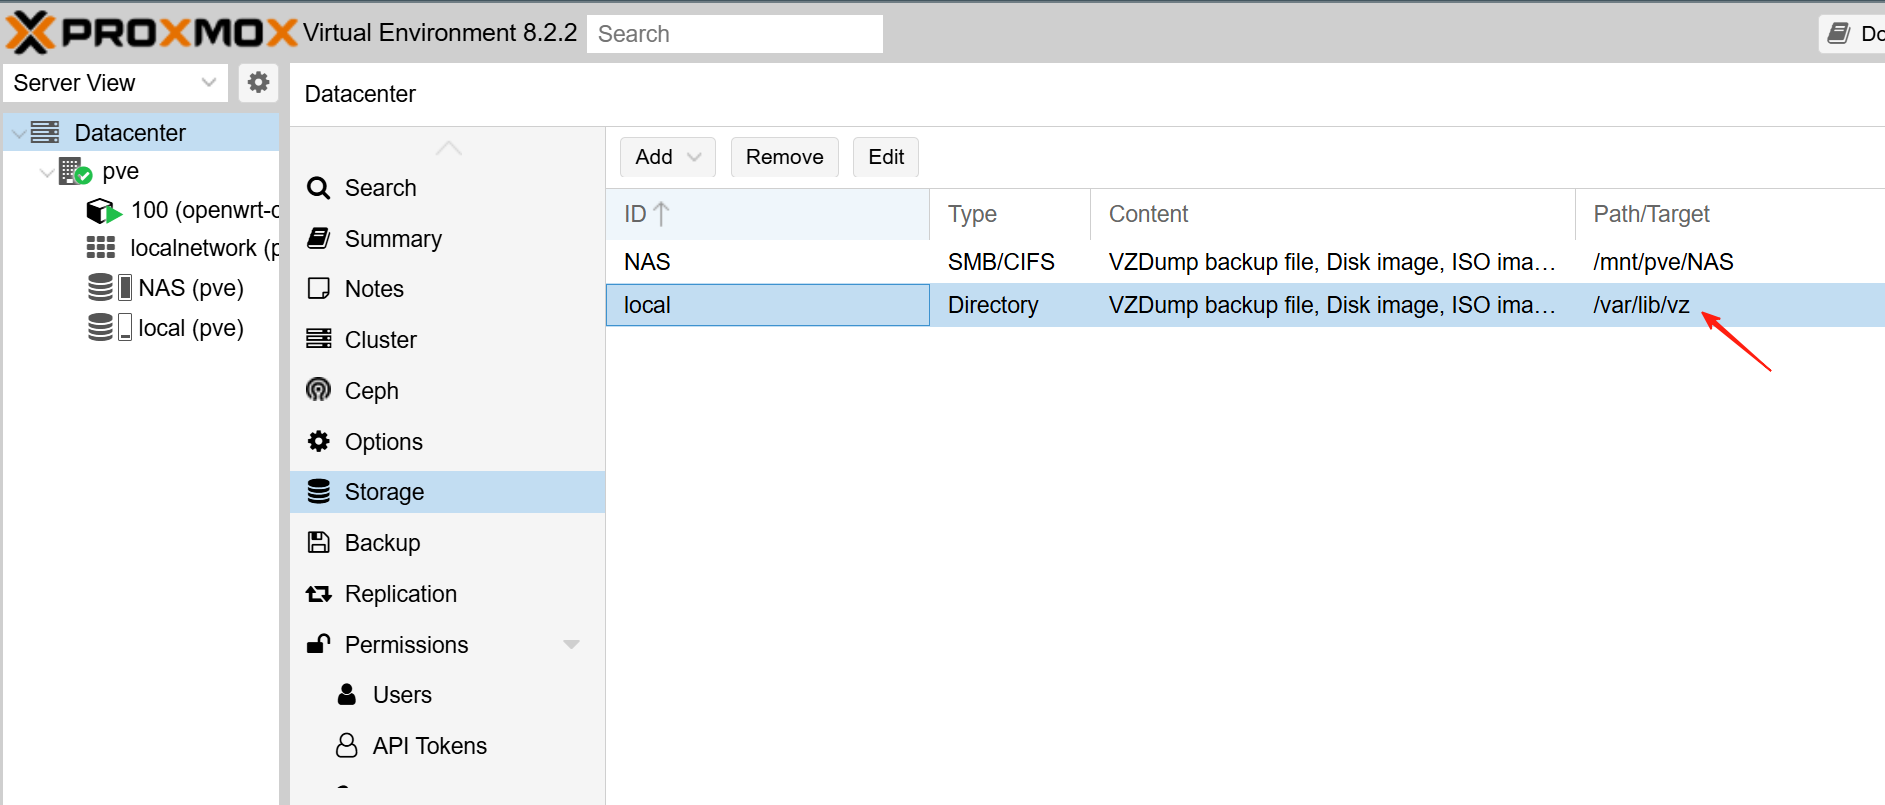
或者命令查看
nano /etc/pve/storage.cfg
把钩子文件导入snippets路径并附可执行权限
chmod +x /var/lib/vz/snippets/100-hook.sh
更改为清华源
sed -i 's_https\?://downloads.openwrt.org_https://mirrors.tuna.tsinghua.edu.cn/openwrt_' /etc/opkg/distfeeds.conf
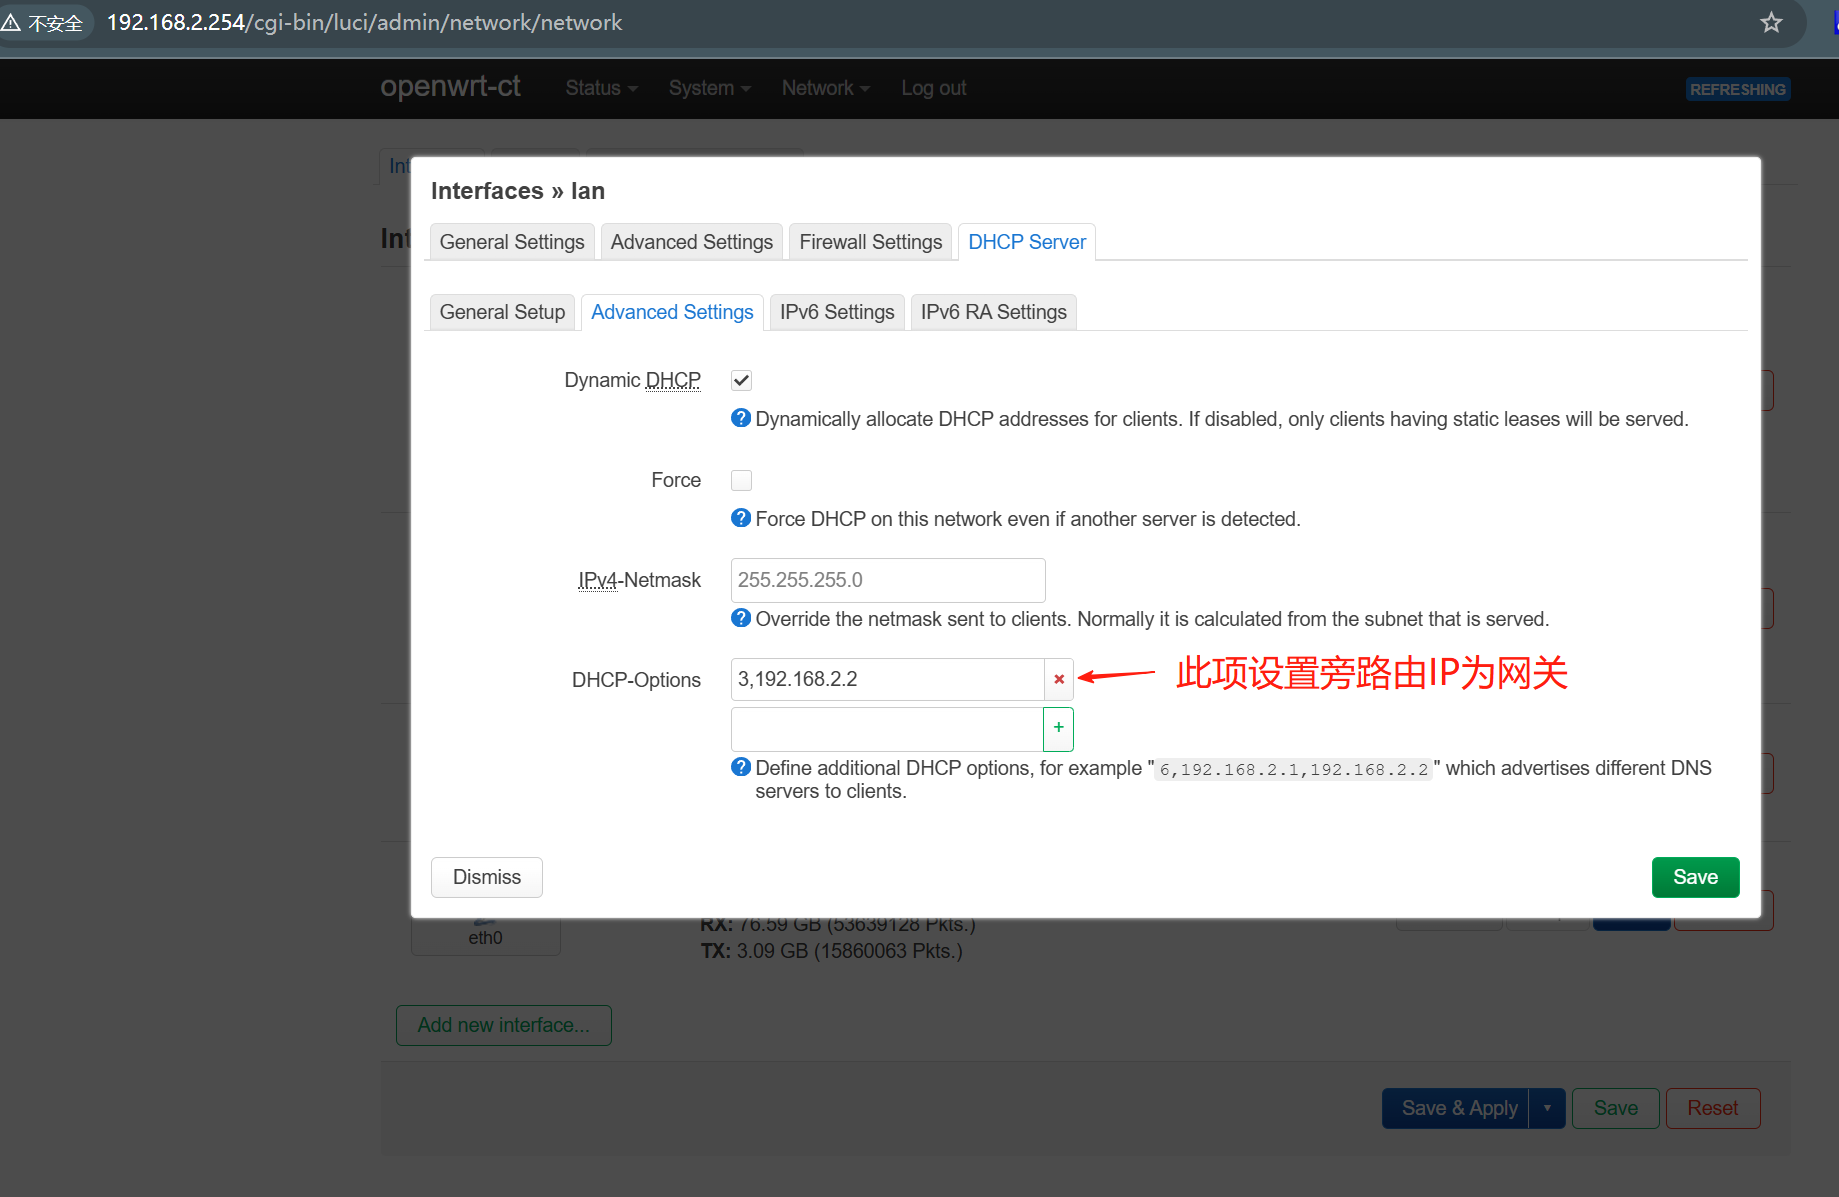
更改默认网关为旁路由
设置项菜单路径:网络 » 接口 » lan » DHCP服务器 » 高级设置 » DHCP 选项
DHCP 选项代码表
| Code代码 | Option Name (选项名称) | Description (描述) |
|---|---|---|
| 1 | Subnet Mask (子网掩码) | Specifies the client’s subnet mask. (指定客户端的子网掩码。) |
| 2 | Time Offset (时间偏移) | Offset from UTC in seconds. Rarely used. (与 UTC 的偏移(秒)。很少使用。) |
| 3 | Router (路由器) | Default gateway. (默认网关。) |
| 6 | Domain Name Server (域名服务器) | DNS server(s). (DNS 服务器。) |
| 15 | Domain Name (域名) | The local domain name (e.g., home.lan). (本地域名,例如:home.lan。) |
| 28 | Broadcast Address (广播地址) | Broadcast address for the subnet. (子网的广播地址。) |
| 42 | NTP Servers (NTP 服务器) | Network Time Protocol servers. (网络时间协议服务器。) |
| 66 | TFTP Server Name (TFTP 服务器名称) | Hostname or IP of TFTP server (used for PXE boot). (TFTP 服务器的主机名或 IP。) |
| 67 | Bootfile Name (启动文件名称) | Bootloader filename (e.g., pxelinux.0) — PXE-related. (引导加载器文件名。) |
| 119 | Domain Search List (域名搜索列表) | List of domain suffixes to search when resolving hostnames. (解析时搜索的域名后缀列表。) |
| 121 | Classless Static Routes (无类别静态路由) | Used for routing multiple subnets (RFC 3442) — more advanced setups. (用于多子网路由的高级配置。) |
| 252 | WPAD (Web Proxy Auto-Discovery) (WPAD 网络代理自动发现) | URL of the WPAD file for proxy auto-config. (代理自动配置用的 WPAD 文件的 URL。) |
选项详解
| Code | Option Name (选项名称) | Implementation Insight (实现细节) | Common Use Case (常见用途) | Reference / Notes (参考 / 注释) |
|---|---|---|---|---|
| 1 | Subnet Mask (子网掩码) | Sent by server in DHCPOFFER/ACK to tell the client its subnet mask. | Set IP range correctly (正确设置 IP 范围) | RFC 2132, Section 3.3 |
| 2 | Time Offset (时间偏移) | Offset from UTC (in seconds); mostly deprecated. | Rare legacy use (较少使用的旧标准) | RFC 2132, Section 3.4 |
| 3 | Router (路由器) | IP(s) of default gateway(s). Often 1 per subnet. | Routing outside LAN (用于子网外路由) | RFC 2132, Section 3.5 |
| 6 | Domain Name Server (域名服务器) | List of DNS servers to be used by the client. | Domain name resolution (域名解析) | Widely used (广泛使用) |
| 15 | Domain Name (域名) | Sent to client so it knows the default domain to append to hostnames. | Local DNS suffixing (本地域名后缀) | e.g., host → host.home.lan |
| 28 | Broadcast Address (广播地址) | Helps client know the subnet’s broadcast address. | Broadcast communications (广播通信) | RFC 2132 |
| 42 | NTP Servers (NTP 服务器) | IP address(es) of time servers. | Time synchronization (时间同步) | RFC 2132, Section 8.3 |
| 66 | TFTP Server Name (TFTP 服务器名称) | Server where PXE clients download boot files. | PXE boot environment (PXE 启动环境) | Used by bootloaders like iPXE |
| 67 | Bootfile Name (启动文件名) | The filename the PXE client will download from the TFTP server. | PXE boot (e.g., pxelinux.0) (PXE 启动文件) |
Must match BIOS/UEFI architecture |
| 119 | Domain Search List (域名搜索列表) | List of domain suffixes used in DNS lookups. | Useful in multi-domain setups (适用于多域环境) | RFC 3397 |
| 121 | Classless Static Routes (无类别静态路由) | CIDR-based routing (e.g., 10.0.0.0/8 via 192.168.1.1). |
Complex routing scenarios (复杂路由场景) | RFC 3442 |
| 252 | WPAD (Web Proxy Auto-Discovery) (WPAD 网络代理自动发现) | Contains a URL like http://wpad.local/wpad.dat |
Used by browsers for auto proxy config (浏览器自动代理配置) | Informal standard (非正式标准) |
单独设置IP绕过旁路由网关设置
编辑设置文件
vi /etc/config/dhcp
# Global DHCP option to override default gateway
config dhcp 'lan'
    option interface 'lan'
    option start '100'
    option limit '150'
    option leasetime '12h'
    list dhcp_option '3,192.168.1.254'  # global geo-free proxy side gateway

# Static lease for the LXC Caddy VM (with a special tag)
config host
    option name 'caddyvm'
    option mac 'AA:BB:CC:DD:EE:FF'
    option ip '192.168.1.100'
    option leasetime '12h'
    option tag 'no_custom_gateway'

#add more like above section for other ip setting

# Override Option 3 just for this tag
config tag 'no_custom_gateway'
    list dhcp_option '3,192.168.1.1'  #main router ip
设置好之后重启网络
uci commit dhcp
/etc/init.d/dnsmasq restart
评论区